
A full fuse is the kilnforming result many beginners picture first: separate compatible glass pieces soften enough to become one smoother, more unified surface. Edges round, layers bond, and the finished piece often has a glossy, integrated look.
But a full fuse is not simply “turn the kiln up until the glass melts.” The schedule has to protect the piece during heat-up, manage trapped air between layers, give the glass enough forming heatwork, then anneal and cool safely so the finished-looking object is stable.
Understanding the job of a full-fuse schedule helps you choose a preset, read manufacturer guidance, and troubleshoot results. If the piece has too many bubbles, not enough bonding, over-rounded edges, or stress problems, the answer is usually in the relationship between construction, heatwork, and cooling.
01 / The desired result
A full fuse asks layers to become one smooth surface.
In a full fuse, compatible glass pieces are heated until they soften enough to bond deeply and flow toward a unified surface. The exact look depends on glass type, thickness, color behavior, texture, and the amount of heatwork delivered by the schedule.
A typical full-fused piece may have rounded edges, softened details, and a smoother face than a tack or contour fuse. Small pieces can spread slightly. Stacked elements may flatten. Fine lines, frit, stringer, and design details may change as the glass relaxes.
This is why full fuse is both useful and powerful. It can make strong blanks for slumping, jewelry, tiles, panels, and components, but it can also erase texture or over-soften details if the schedule gives too much heatwork.
The goal is not maximum melting. The goal is the right amount of bonding and smoothing for the piece you want to make. That is a studio decision, not only a temperature target.
Full fuse means enough heatwork for deep bonding and smoothing — not uncontrolled melting.
02 / Bubble squeeze
Air needs a chance to escape before the surface seals.
Layered glass can trap air. As the glass softens, the top layer may begin to seal before air has moved out from between pieces. A full-fuse schedule often uses a controlled climb and sometimes a hold to reduce that risk.
This bubble-squeeze strategy is especially important for larger sheet layers, powder, frit, textured glass, inclusions, or layouts where air paths are limited. The schedule is trying to let the glass soften gradually enough for air to travel instead of being captured under a closing surface.
Construction still matters. Clean glass, thoughtful overlaps, escape paths, and careful use of powders or inclusions can make the schedule’s job easier. A bubble squeeze cannot guarantee bubble-free glass if the layout traps air with nowhere to go.
When evaluating bubbles after a full fuse, notice whether they are small and scattered, large and trapped, near edges, between layers, or around inclusions. Each pattern suggests a different combination of construction and schedule adjustments.
A full-fuse schedule should manage air before it asks the glass to fully smooth out.
03 / Forming heatwork
The full-fuse look comes from temperature, time, and kiln behavior.
The forming phase is where the full-fuse result becomes visible. The glass softens, layers bond, edges round, and the surface becomes more unified. The amount of change depends on target temperature, hold time, rate, thickness, shelf position, and the kiln’s actual performance.
This is where heatwork matters. A slightly lower target with a longer hold can sometimes produce a result similar to a higher target with a shorter hold, but not always. Kilns also vary, and the same written schedule may behave differently in a small jewelry kiln, a larger studio kiln, or a heavily loaded firing.
If the piece is underfused, you may see sharp edges, incomplete bonding, or texture that remains stronger than intended. If it is overfused, details may disappear, edges may over-round, or the glass may spread more than desired.
The best adjustment depends on the result. You might change the forming hold, shift the target slightly, slow or quicken the approach, or test a different shelf position. The important thing is to connect the adjustment to the visible behavior rather than chasing a universal “perfect full fuse” number.
The full-fuse result is controlled by total heatwork, not by the peak temperature alone.
04 / Thickness and volume
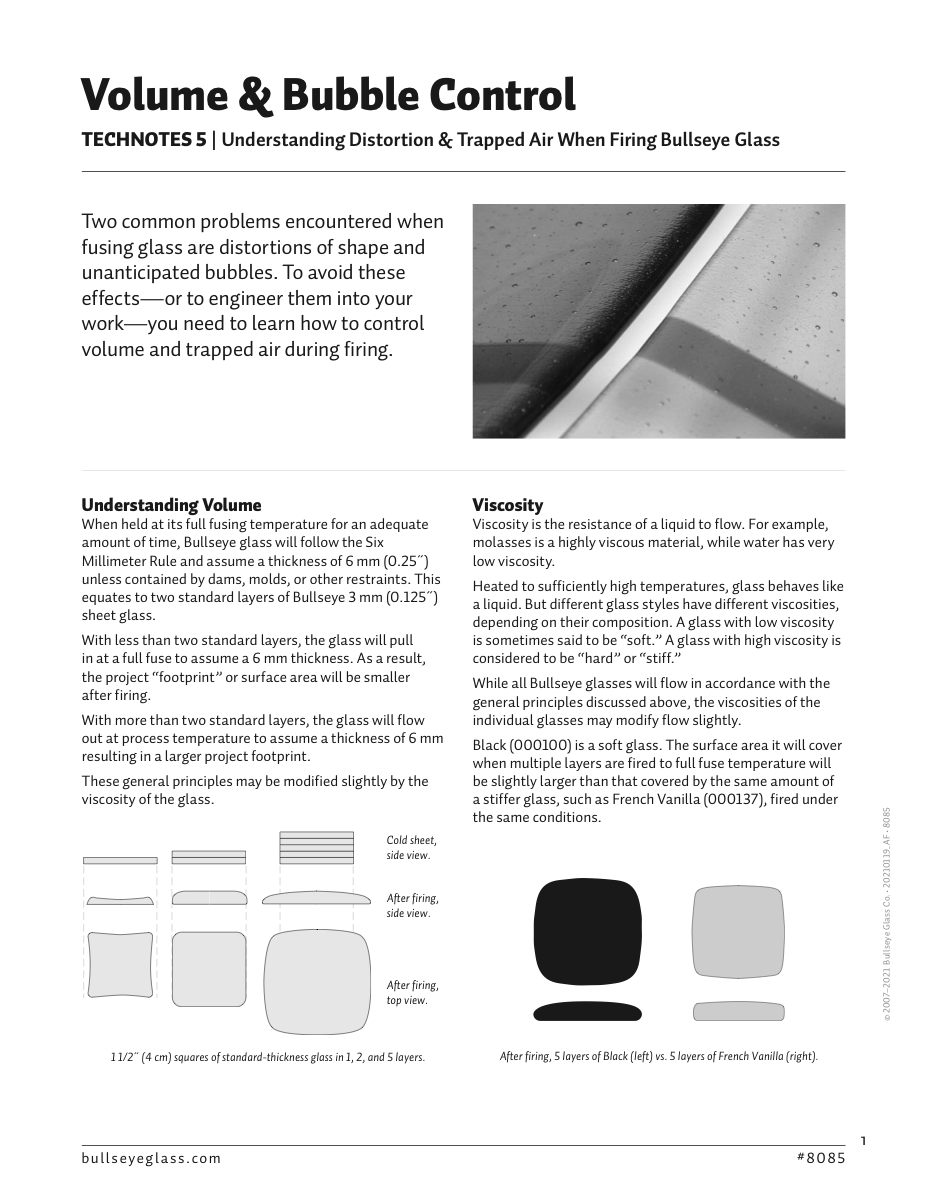
Glass wants to find its own thickness.
As glass softens in a full fuse, volume and thickness begin to matter. Glass has a natural tendency to move toward an equilibrium thickness, which is why very thin areas may pull in and thicker stacks may spread or level differently than expected.
Designs with uneven stacks, isolated dots, stringer, frit piles, borders, dams, or thick accents can behave differently from a simple two-layer blank. The schedule provides the heat, but the physical arrangement influences how the glass moves.
This is also why full-fuse results can vary across a piece. A corner, border, raised element, or dense color area may receive or respond to heat differently. Shelf position and kiln hot spots can add another layer of variation.
Good planning means thinking about construction before firing. If you want a smooth blank, build with air paths, compatible glass, and thickness in mind. If you want to preserve detail, full fuse may not be the right process, or the schedule may need to stay closer to contour-fuse territory.
The schedule shapes the firing, but the glass layout shapes what the heat can do.
05 / Annealing after a full fuse
A smooth surface still needs a safe cool.
After the full-fuse result appears, the piece is not finished in the structural sense. It needs to move through annealing and cooling in a way that relieves stress and avoids creating new stress as the glass contracts.
Thickness, size, uneven mass, and complexity all affect annealing needs. A simple small tile and a thicker multi-layer panel should not be treated as identical just because both were full fused.
The anneal hold allows temperature within the piece to even out. The controlled cool that follows protects the work through a sensitive range. This part of the schedule may feel less dramatic than the forming phase, but it is what helps the finished piece survive use, shipping, hanging, washing, or later slumping.
If you plan to slump a full-fused blank later, annealing still matters. A blank carrying hidden stress can fail in a later firing or in handling. Treat the full fuse as one step in a longer making process, not as an isolated event.
Full fuse creates the surface; annealing protects the object.
Studio notes
How to use this in the studio
Use these as practical prompts for a kiln log, a studio conversation, or your next firing test.
- Use full fuse when you want deeper bonding and a smoother surface than tack or contour fuse.
- Plan air paths before firing; do not ask the schedule to solve every trapped-air problem alone.
- Record whether the result was underfused, fully fused, or over-softened in visual language.
- Anneal for the actual thickness and complexity of the piece, especially if the blank will be slumped later.
Source references
Additional resources

One practical firing tip a week
Get a short glass-studio note in your inbox.
No spam — just one useful firing, glass, or studio-practice idea from My Glass Cookbook each week.
Your email is used for MGC studio notes. Read the Privacy Policy.