
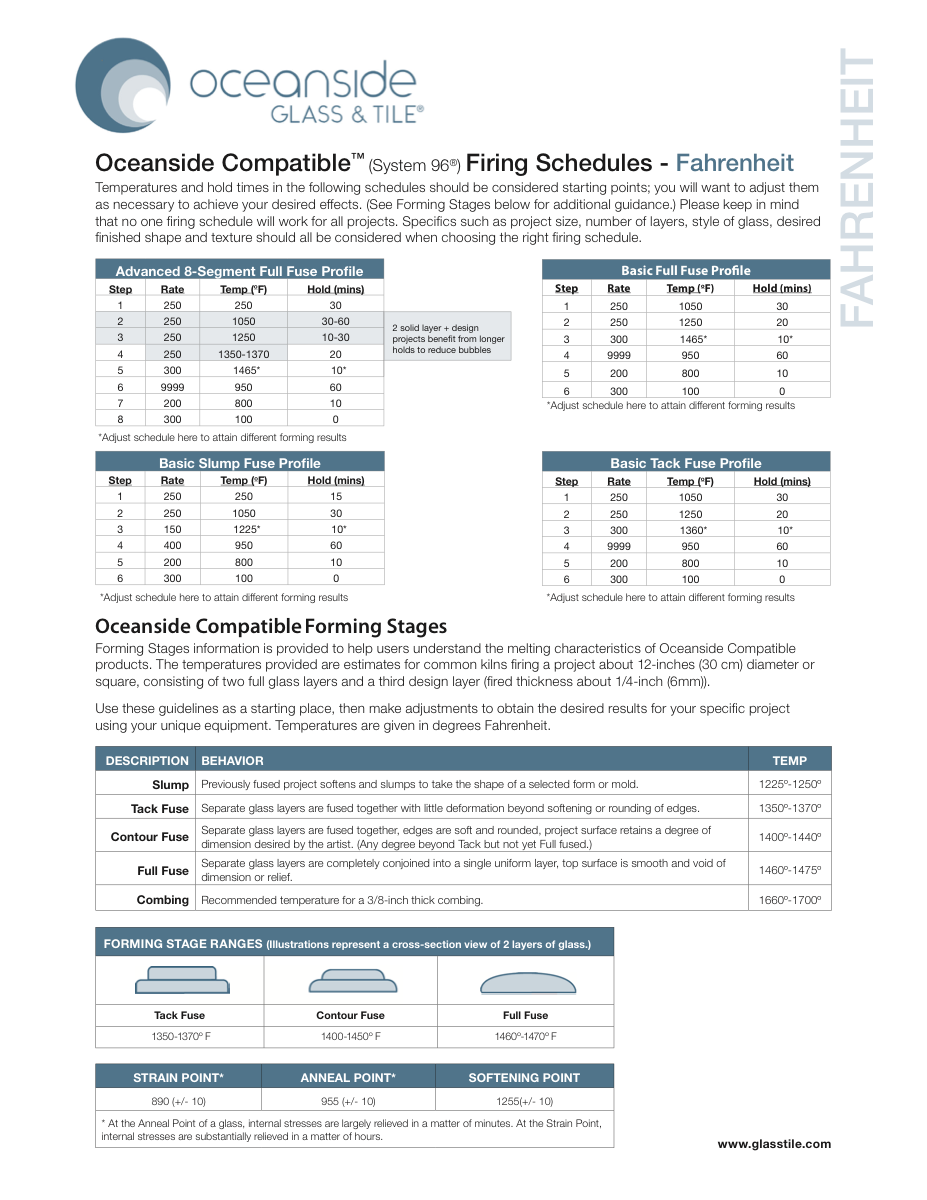
Most fused-glass firings can be understood as a journey through five practical phases. Different studios may use different names, and schedules vary by glass, thickness, process, kiln, and desired result. But the underlying jobs are recognizable.
Naming the phases helps you troubleshoot. Instead of saying “the schedule did not work,” you can ask sharper questions: Did the piece heat too quickly? Did air have time to escape? Did the glass get too much heatwork? Was the anneal adequate? Did the cooling move too fast?
The phases are not hard borders; they overlap and vary by process. But they give you a mental map. Once you can name the job of each part of the firing, the schedule becomes easier to read, adjust, and discuss with other artists.
01 / Initial heat-up
Warm the glass without shocking it.
The first phase brings the piece up from room temperature while avoiding thermal shock and giving moisture, glue, shelf materials, or binders time to behave. Thin simple pieces can often tolerate a more confident climb. Thick, uneven, or heavily assembled work needs more patience.
This phase is where many artists learn that “slow” is not a moral virtue; it is a tool. Use it where the work is vulnerable.
Thermal shock happens when different parts of the glass expand at different rates. A rapid early climb can put stress into the piece before it has had time to equalize. Thicker glass, stacked layers, uneven shapes, inclusions, and cold shelves can all make that risk more important.
The early heat-up is also where studio materials begin to matter. Glue, moisture, fiber paper, kiln wash, and binders can behave differently as temperature rises. A thoughtful warm-up gives the firing a cleaner start before the glass begins to soften in earnest.
Goal: protect the work while temperature begins to even out.
02 / Bubble squeeze
Give trapped air a chance to escape.
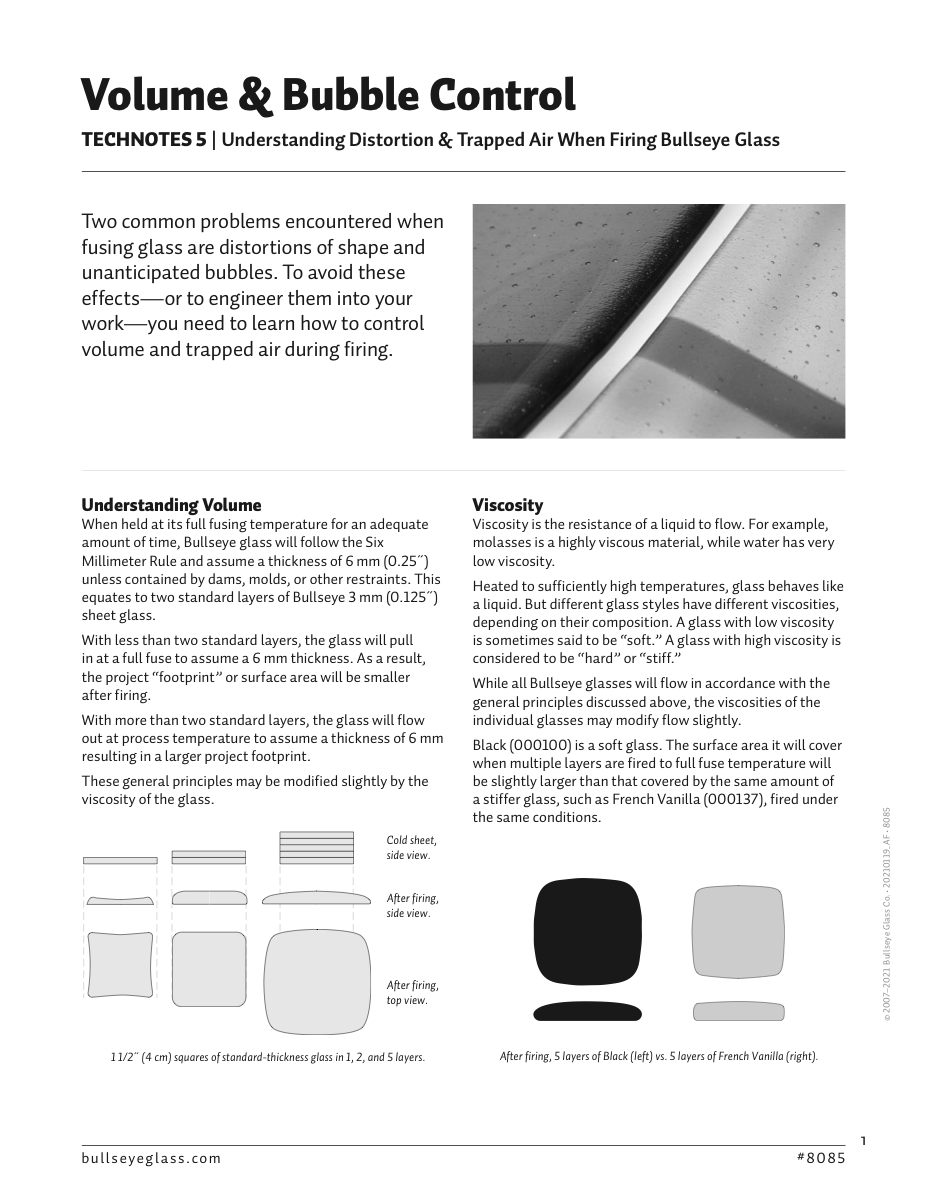
As glass softens, the top surface can begin to seal before air between layers has moved out. A bubble squeeze phase uses a controlled climb and sometimes a hold to reduce trapped bubbles, especially in layered work.
This is not magic, and it will not fix every construction problem. But it is one of the clearest examples of a schedule working with physical behavior instead of simply racing to peak temperature.
Bubble strategy starts before the kiln is turned on. Sheet size, overlap, powder use, texture, dams, shelf contact, and how layers are arranged all influence where air can travel. The schedule can help, but it cannot always rescue a construction that gives air no path out.
A useful bubble squeeze is usually about time and restraint. The glass needs to soften enough for air to move, but not so quickly that the surface closes too soon. This is one reason a slower segment or a purposeful hold can change the final clarity of a fused piece.
Goal: let air move before the glass closes over it.
03 / Forming temperature
Create the visual result: tack, contour, full fuse, or slump.
The forming phase is where the glass visibly changes. Edges round, layers bond, texture softens, or a sheet relaxes into a mold. This is the phase many beginners focus on first because it is where the desired look appears.
But forming is affected by everything that came before it. The same peak temperature can produce a different surface if the kiln climbed more slowly, held longer, or the glass had more time to absorb heat.
Think of forming as a range of possible behaviors, not a single moment. A tack fuse may preserve texture and individual pieces. A contour fuse may soften edges while keeping some relief. A full fuse may level and smooth. A slump asks the glass to move under gravity into or over a form.
Small changes here can be very visible. A few extra minutes, a slightly higher target, a different mold, or a hotter shelf position can change the surface. That is why it helps to record the intended effect and the actual result in plain language, not just the final temperature.
Goal: reach the right amount of heatwork for the intended surface or shape.
04 / Drop toward anneal
Move away from forming heat without adding new problems.
After forming, the schedule often cools relatively quickly toward the annealing range. The glass is no longer being asked to soften further, but it still needs to arrive at annealing in a controlled way.
This transition is one reason a firing schedule is a whole path. The “after peak” decisions are not housekeeping; they are part of the result.
If the glass stays too long near forming temperatures, it may continue to change: edges can soften more, texture can fade, or a slump can continue farther than intended. Moving away from forming heat helps stop the visual action at the right moment.
At the same time, this is not a reckless crash to room temperature. The schedule is moving toward the range where stress relief can happen. The piece is changing from a forming problem into an annealing problem, and the firing needs to respect that handoff.
Goal: leave forming temperature and prepare for stress relief.
05 / Anneal and cool
Relieve stress before the kiln returns to room temperature.
Annealing is the phase that protects the piece after it looks finished. The glass is held and cooled in a way that allows internal stress to relax. Thicker work, uneven forms, and complex assemblies generally need more careful annealing and cooling.
A piece can look successful when the kiln opens and still carry stress that shows up later as cracks, breaks, or vulnerability. That is why annealing deserves as much respect as the dramatic forming phase.
The anneal hold gives the whole piece time to come closer to an even internal temperature. The controlled cool that follows prevents new stress from building as the glass contracts. For thicker or more complex work, this part of the schedule can be the difference between a beautiful object and a fragile one.
For beginners, the key habit is simple: do not treat the firing as over when the peak temperature is done. The safest schedule reads the cool-down as part of the making process. The finished surface matters, but so does whether the piece survives handling, hanging, washing, shipping, and time.
Goal: make the finished-looking piece stable enough to survive handling and time.
Studio notes
How to use this in the studio
Use these as practical prompts for a kiln log, a studio conversation, or your next firing test.
- Label phases in your kiln log, not just temperatures.
- If bubbles are the problem, look at construction and bubble-squeeze strategy before only lowering peak temperature.
- If edges over-round or texture disappears, examine total heatwork: rate, target, and hold together.
- If cracks appear after firing, treat annealing and cooling as prime suspects, especially for thicker work.
Source references
Additional resources
One practical firing tip a week
Get a short glass-studio note in your inbox.
No spam — just one useful firing, glass, or studio-practice idea from My Glass Cookbook each week.
Your email is used for MGC studio notes. Read the Privacy Policy.