
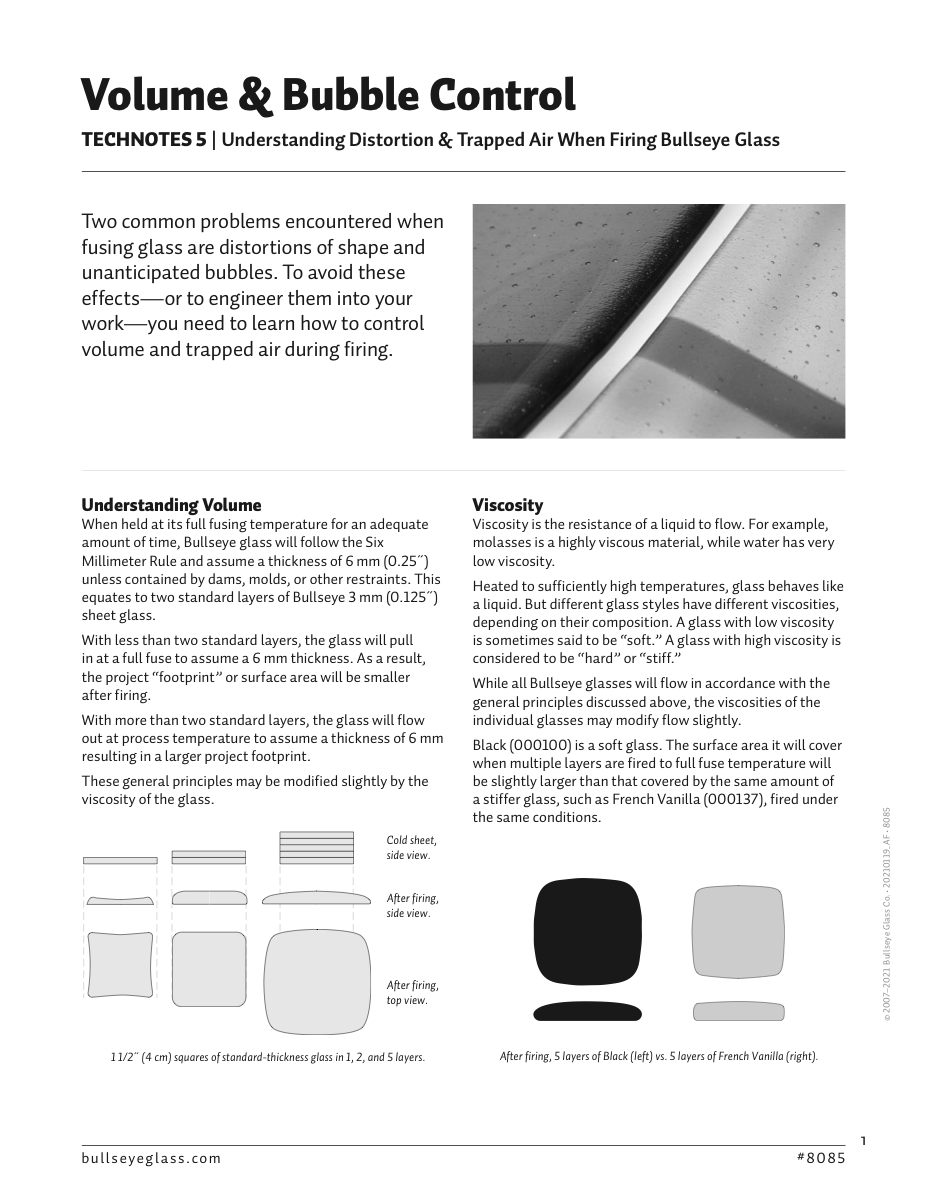
Bubble squeeze is one of the clearest examples of a kiln schedule solving a physical problem. When glass layers begin to soften, air between them needs time and a path to escape. If the surface seals too soon, that air can become bubbles inside the finished piece.
A bubble squeeze is not one magic temperature. It is a strategy: slow down or pause in the part of the firing where glass can soften enough for air to move without closing too quickly over the trapped spaces.
The schedule matters, but so does the construction. A good bubble squeeze works best when the glass layout gives air somewhere to go.
01 / The problem
Air gets trapped when the surface closes too soon.
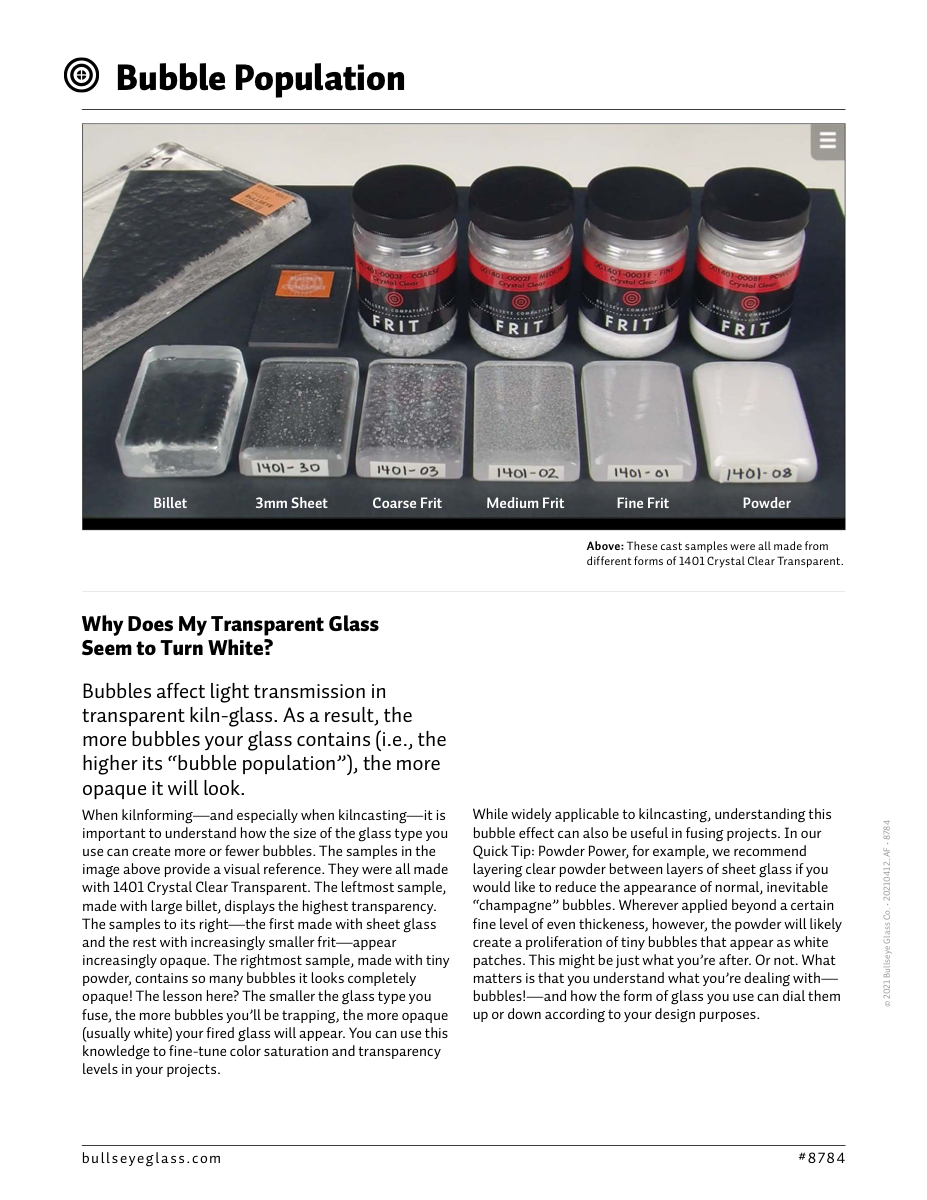
Layered glass is rarely perfectly air-free. There may be tiny spaces between sheets, around frit, under stringer, along textured surfaces, near inclusions, or between uneven pieces. As the kiln heats, those spaces become important.
If the top layer begins to soften and seal while air is still inside, the air can collect into bubbles. Some bubbles are small and part of the look. Others become large domes, cloudy fields, weak spots, or surprises in places where the design needed clarity.
A bubble squeeze tries to delay that sealing moment long enough for air to travel outward. It does not remove the need for clean glass, thoughtful layup, and escape paths.
Bubble squeeze is about timing: let air move before the glass locks it in.
02 / Construction first
The schedule cannot fix every trapped-air design.
Large sheets stacked flat, sealed borders, heavy powder fields, textured glass, inclusions, and dams can all create different air problems. Some layouts naturally give air a path to the edge. Others create pockets that a schedule may only reduce, not eliminate.
Before relying on the schedule, look at the piece as an air map. Where can air move as the glass softens? Where might it get sealed? Are there wide flat areas, closed shapes, thick piles, or materials that burn out and create gas?
Changing the layup can be as important as changing the firing. Small shifts in overlap, vent paths, powder use, cleaning, edge arrangement, and how pieces touch can make the bubble squeeze more effective.
A bubble squeeze gives air time; the construction has to give air a route.
03 / Schedule behavior
The useful segment is controlled, not rushed.
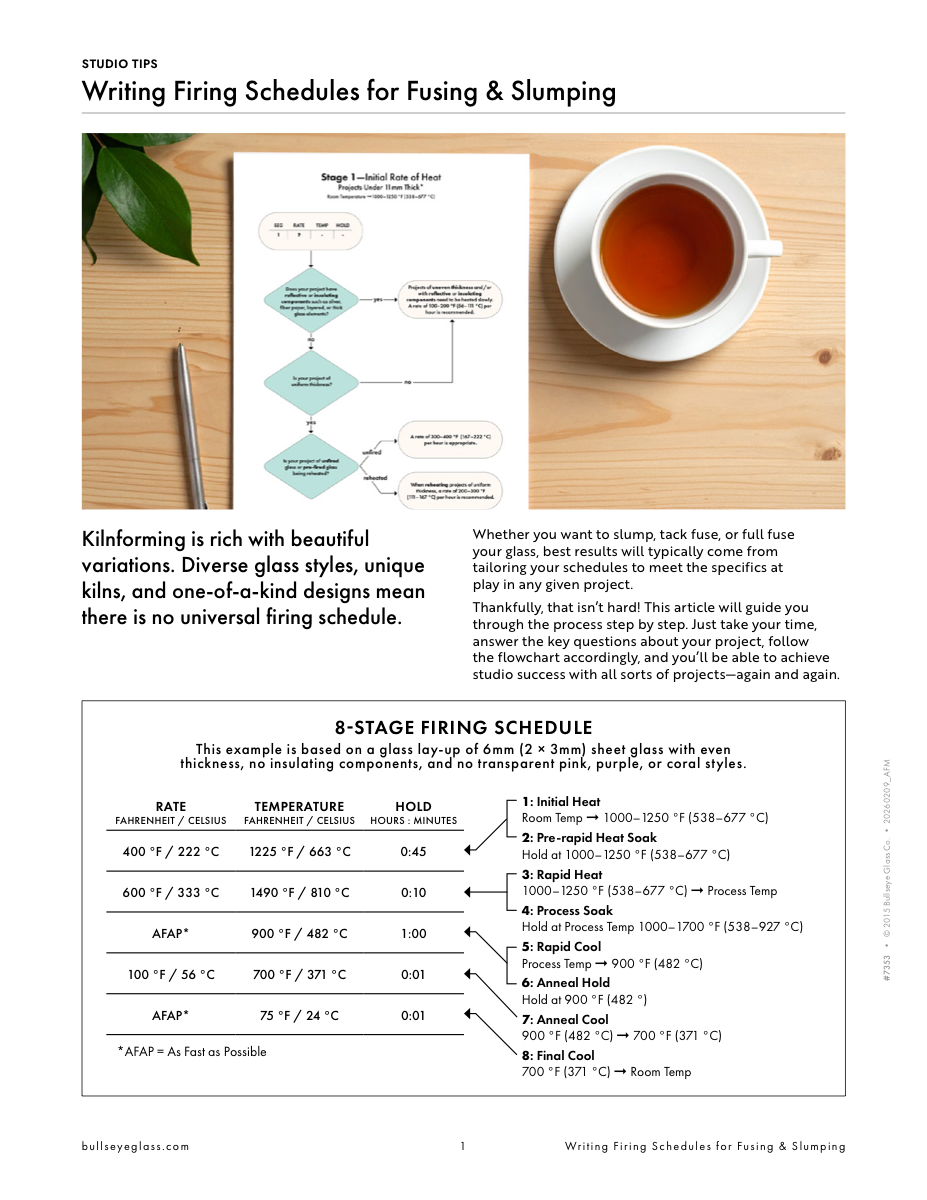
In schedule terms, bubble squeeze usually means a more controlled climb and sometimes a hold before the glass reaches its main forming temperature. The exact numbers depend on glass system, thickness, kiln, and process, so the concept matters more than memorizing one universal recipe.
Too little time and the surface can seal over trapped air. Too much heatwork and the glass may start to round, spread, or change more than the design needs before the main forming phase. The goal is not to make the schedule slow everywhere; it is to be patient in the range where air movement matters.
This segment also interacts with the rest of the firing. A full fuse, contour fuse, tack fuse, or thick slab may each need a different balance of bubble strategy, forming heatwork, and annealing.
A good bubble squeeze is targeted patience, not a slow firing for its own sake.
04 / Reading bubble results
Bubble patterns are clues for the next test.
After firing, study where the bubbles are. Large central domes, bubbles near edges, bubbles around inclusions, tiny champagne bubbles, and cloudy sheets can point to different causes.
If bubbles sit under large capped areas, construction may need better air paths. If they cluster around powder or frit, material choice and placement may matter. If the whole piece shows more bubbles than expected, the squeeze segment, cleaning, shelf setup, or glass texture may be involved.
Do not change everything at once. Adjust construction and schedule in a way that lets the next firing teach you something. A kiln log with photos is especially useful because bubble patterns are visual evidence.
Bubbles are not just defects; they are a map of where air got trapped.
Studio notes
How to use this in the studio
Use these as practical prompts for a kiln log, a studio conversation, or your next firing test.
- Look at the glass layout as an air map before firing.
- Use bubble squeeze as a targeted strategy, not as a promise of bubble-free glass.
- Record bubble size, location, and pattern after the firing.
- Change construction and schedule deliberately so the next test has a clear lesson.
Source references
Additional resources
One practical firing tip a week
Get a short glass-studio note in your inbox.
No spam — just one useful firing, glass, or studio-practice idea from My Glass Cookbook each week.
Your email is used for MGC studio notes. Read the Privacy Policy.