
A kiln schedule preset is useful only when it matches the job the glass is being asked to do. The best starting question is not “what temperature should I use?” It is “what result am I trying to create, and what does this piece need protection from?”
This decision guide pulls the series together. Full fuse, tack fuse, contour fuse, slump, fire polish, bubble squeeze, thick-glass, and special-process schedules are not just labels. They are different answers to different studio problems.
Use presets as starting points, then adjust with judgment. Your kiln, glass system, thickness, construction, mold, shelf position, and firing history still matter.
01 / Start with the desired result
Name what the glass should do.
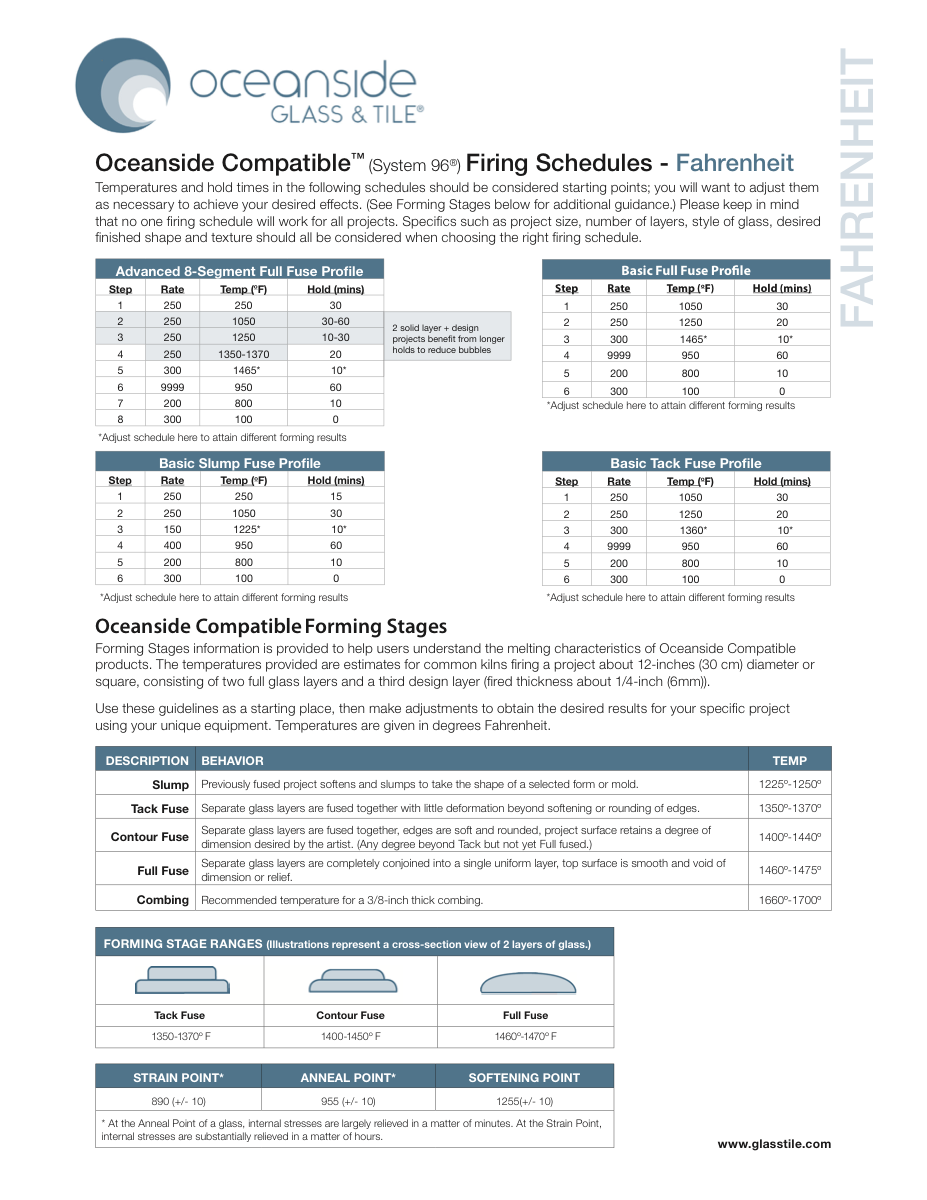
If you want separate pieces to become a smooth unified blank, you are thinking about full fuse. If you want raised texture to remain, you are closer to tack fuse. If you want softened relief without full flattening, contour fuse may be the better starting point.
If the piece is already fused and needs to become a dish, tray, or curved form, the main process is slumping. If the object mostly needs a smoother coldworked edge or surface, fire polish is a narrower surface treatment.
When the project involves thick mass, repeat firings, casting, pot melts, or drop-outs, the preset choice should immediately shift toward more specific guidance. Those pieces carry more risk than ordinary thin fusing examples.
Choose the preset by the job, not by the hottest number in the schedule.
02 / Check the risk factors
Thickness, complexity, and support change the schedule choice.
Before choosing a preset, check the piece itself. How thick is the thickest area? Is the thickness even? Are there inclusions, powder, frit, heavy borders, stacked details, dams, or sealed air pockets? Is the piece going onto a mold?
A simple two-layer tile and a thick uneven panel may both be “full fuse” projects, but they should not automatically receive the same caution. A small slump and a deep mold may both be “slumping,” but the mold geometry and mass can change the safe path.
Risk factors do not mean the project is impossible. They mean the schedule needs to protect the real object rather than the imaginary average version of it.
The preset names the process; the risk factors tell you how cautious the schedule needs to be.
03 / Read the preset before using it
Understand the segments, not just the label.
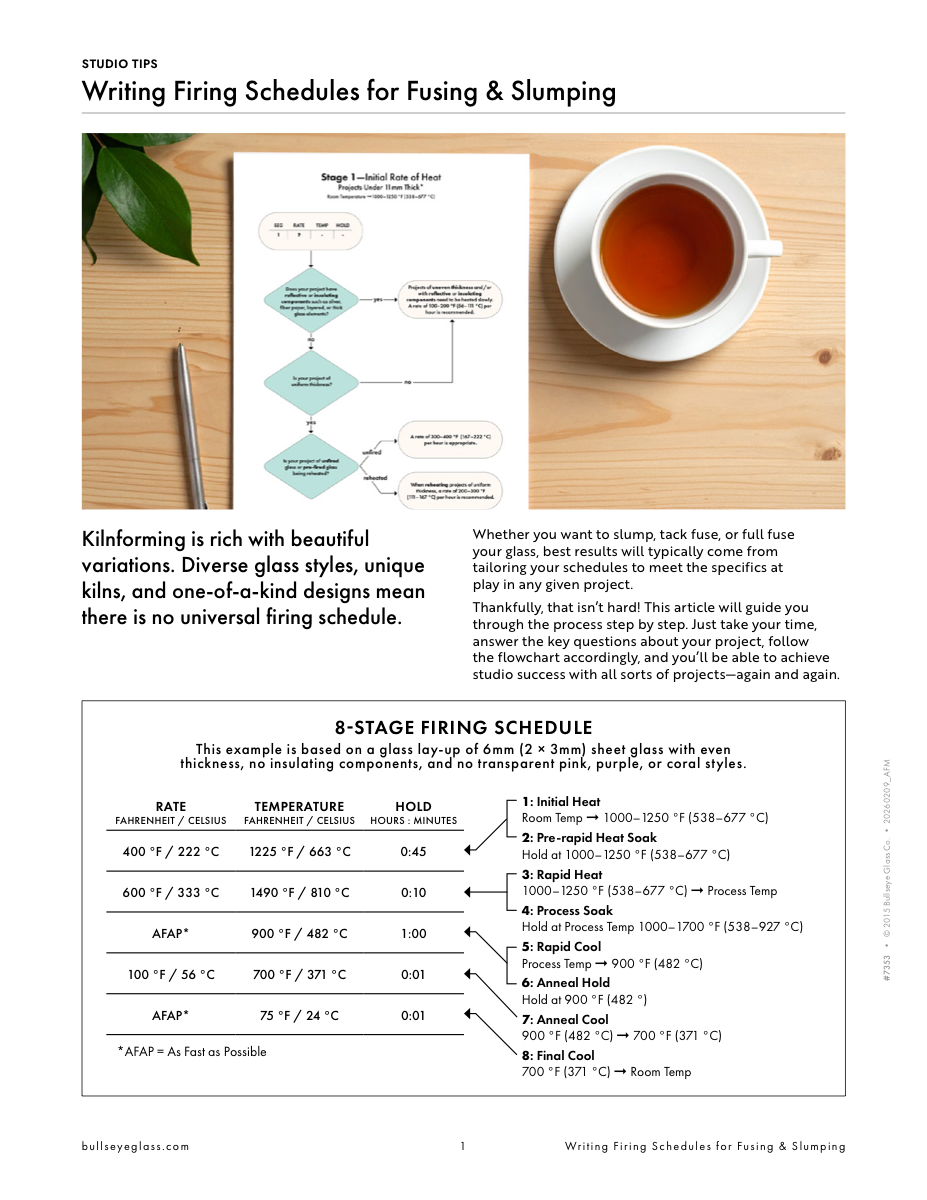
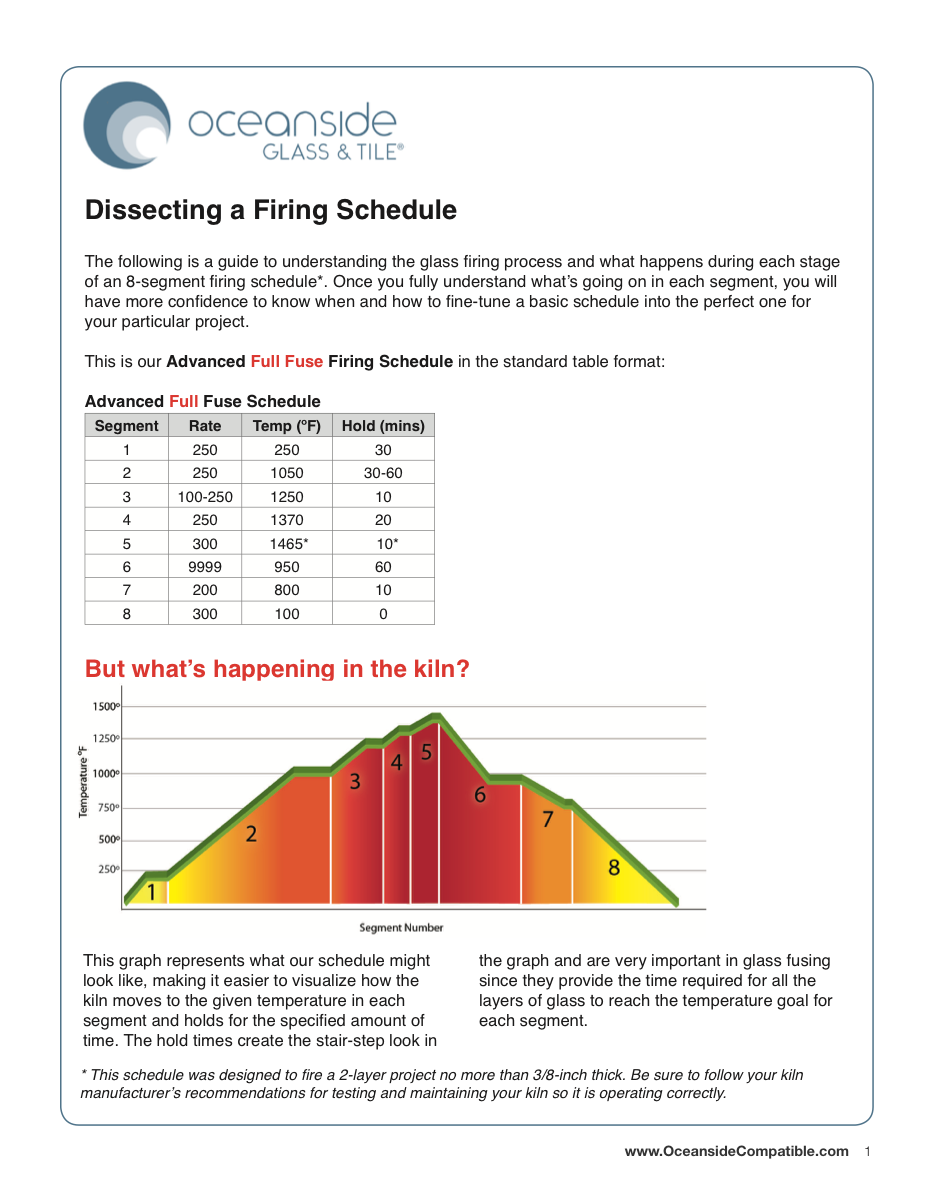
A preset should still be read as rate, target, and hold. Where does it heat gently? Where does it manage bubbles? Where does it create the visible result? How does it leave forming temperature? How does it anneal and cool?
This habit catches mismatches. A preset may be designed for a thinner piece, a different glass system, a different mold, or a different visual result than the project in front of you.
If you cannot explain the purpose of the key segments, slow down and compare the preset to manufacturer guidance or your own kiln notes before committing an important piece.
A preset is a readable starting schedule, not a command to stop thinking.
04 / Adjust one reason at a time
Change the segment connected to the result.
If the piece underfused, the forming heatwork may need attention. If it over-rounded, reduce total heatwork before blaming only peak temperature. If bubbles appeared, look at construction and bubble squeeze. If cracking or later failure is the issue, review heat-up, annealing, and cooling.
Good preset use means making changes for a reason. Add time because the glass needed more movement. Reduce a hold because the surface over-softened. Slow a ramp because the mass needed equality. Extend annealing because the actual thickness required it.
Change one or two things at a time and record the result. The goal is to build a personal map of your kiln, not to chase a perfect universal preset.
Adjust the part of the schedule connected to the evidence you can see.
05 / Use KSD as a thinking tool
Let the designer organize the schedule, then use studio judgment.
Kiln Schedule Designer can help turn your process choice into a readable ramp/hold schedule with a firing curve and studio record. That is useful because it keeps the segments visible instead of hiding the logic behind a name.
Use the tool after you understand the result you want. Choose the closest preset, check the assumptions, compare against manufacturer guidance, and write a note about why the schedule fits this piece.
The best workflow is educational: learn the process, choose a starting preset, fire carefully, record the result, and adjust based on evidence from your own kiln.
The tool can organize the schedule; the artist still chooses the right starting question.
Studio notes
How to use this in the studio
Use these as practical prompts for a kiln log, a studio conversation, or your next firing test.
- Start every preset decision with the desired result: smooth, textured, softened, shaped, polished, thick, or special-process.
- Check glass system, thickness, construction, mold, shelf position, and firing history before accepting a preset unchanged.
- Write one sentence explaining why the chosen preset fits the piece.
- After firing, record whether the preset was too much, too little, or a good starting point for your kiln.
Source references
Additional resources
One practical firing tip a week
Get a short glass-studio note in your inbox.
No spam — just one useful firing, glass, or studio-practice idea from My Glass Cookbook each week.
Your email is used for MGC studio notes. Read the Privacy Policy.